

The interface for managing your bar or restaurant on Bartopia can be intimidating, and learning new software is rarely fun. But don’t worry, our Admin Accounts are more intuitive than they seem and we’re here to walk you through the whole process, both in this guide and in person.
Claiming Your Listing
The first step to claiming your listing is getting to it. You can search for the name of your business in the search box and it will pop up.
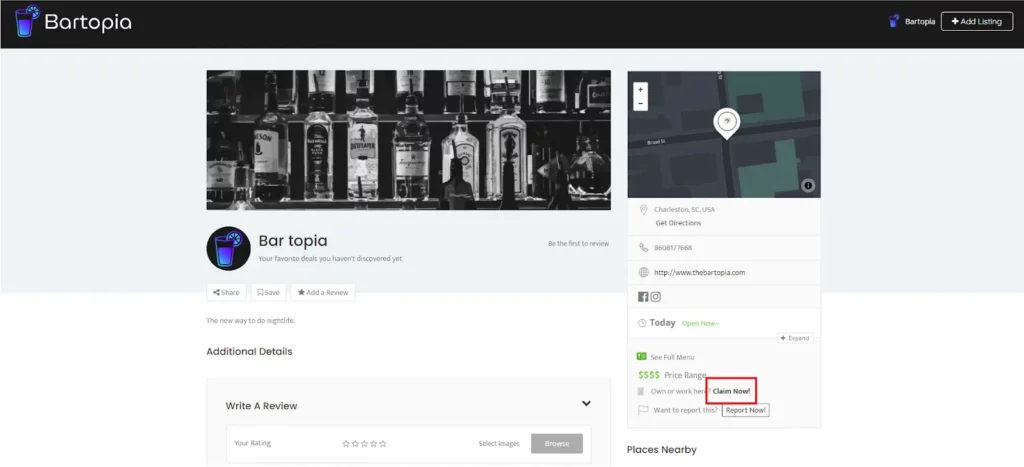
Once you’re on the page, click the “Claim Now!” button in the bottom right of the screen. It will be below the map and business information. Once your click to claim it, you’ll see this form:
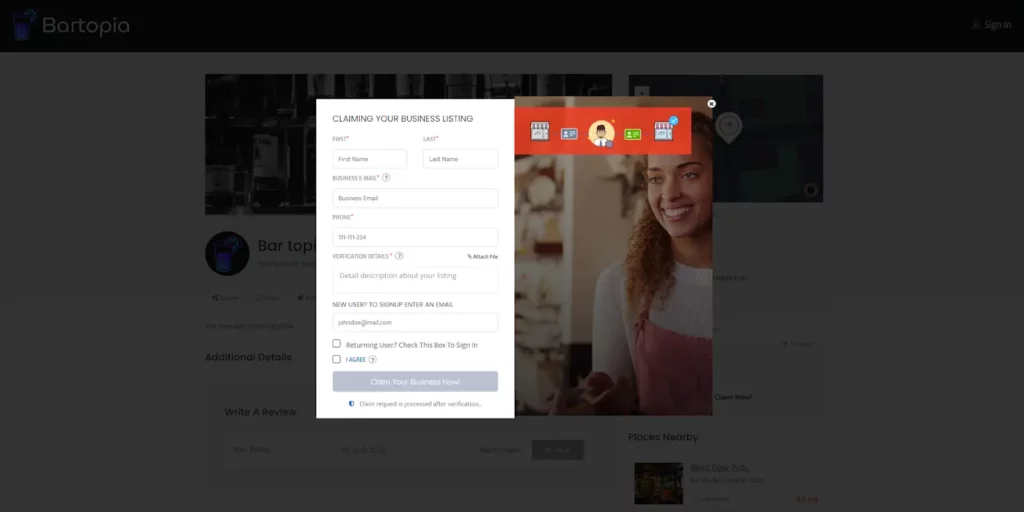
None of this information is public facing, it’s only for your use of this account as a professional. Use whichever email address and phone number you prefer. For the “Verification Details”, this is where we make sure you are indeed an authorized admin for this business, and to avoid imposters messing with your brand profile.
If you’ve already spoken with Alex or Thomas, please just write one of our names or ignore this section. If you haven’t, we’re thrilled you’ve found this on your own and to get you set up. The easiest way to verify you is to have you message us on your official Instagram account with the same first and last name you filled this form out with. We’ll reach out to you after to introduce ourselves and offer any assistance you might need!
The last part of this form is entering an email address you’d like to use as a login. This will automatically create an account for you and send you an email to create a password to sign in with. Just please make sure not to check the box that says “Returning User? Check This Box To Sign In” unless you’ve already created an account.
Intro
Once you have successfully claimed your bar/restaurant’s page on Bartopia, you will be able to add to and edit any information about your business. After we have approved your claim, you will see the check-mark verification next to your page’s name [1], and the bar at the bottom with the Edit button in the bottom right [2].
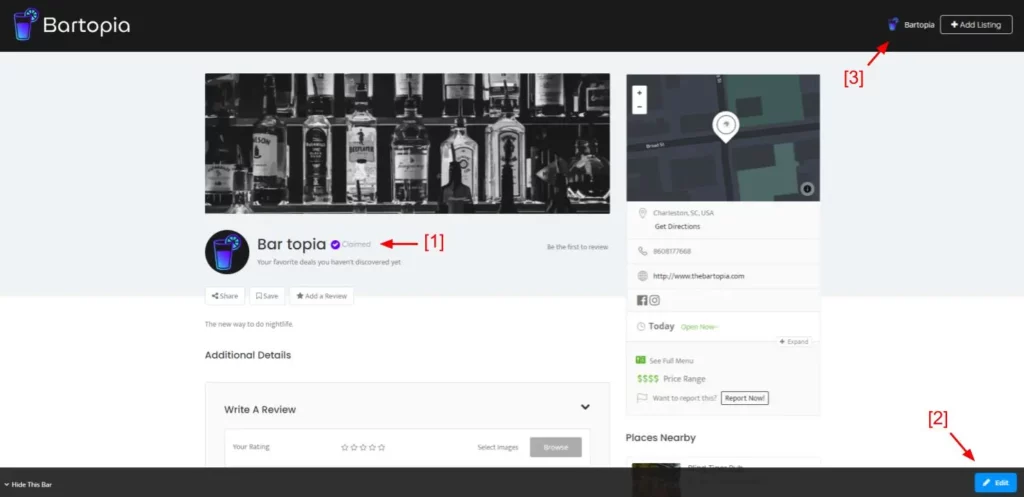
The Edit button [2] contains all information about your establishment that is permanent or long term such as address, phone number, social media, hours, etc. This is also where you will upload and change your weekly deals.
All other information can be found in your Dashboard, which can be accessed by hovering over your personal profile in the top right corner [3 then clicking “Dashboard”, or clicking on right on your name.
We will walk through both sections below, or you can skip to a specific section.
Edit Listing
Lets dive into what information is held in the “Edit Your Listing” page, accessed by clicking the Edit button in the bottom right corner ([2] in the above image).
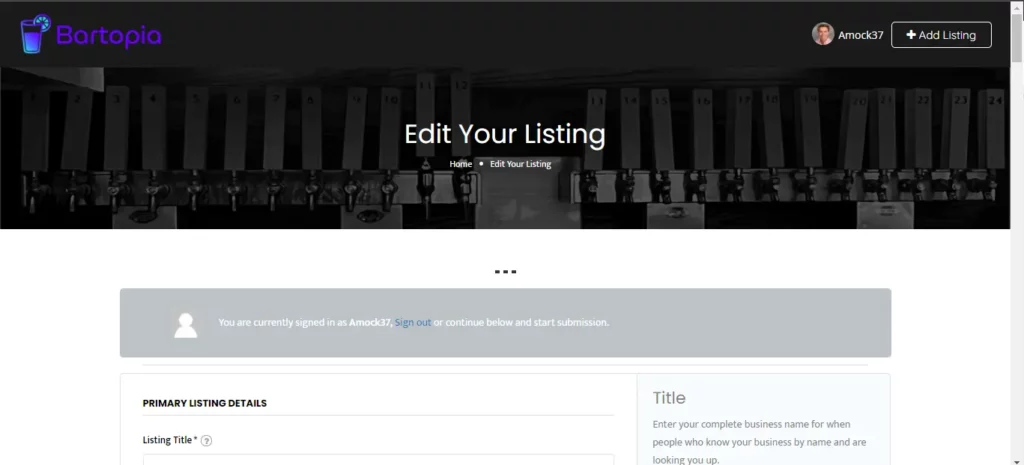
This area is where you can edit most of the long-term or permanent information about your business, similar to what you’d find from searching for it on Google. Note that aside from changing your weekly deals at the bottom of this section, all information about the details of your bar/restaurant, such as uploading menus and events, is in your Dashboard.
In most cases, we have created the listing and filled out all of this information for you. So the parts most subject to change are probably Business Hours or Weekly Deals. As you’ll see, we have tips next to each field guiding you through it, but this is a comprehensive guide if you need further clarification. As always feel free to shoot us an email with questions as well. Let’s dive in!
Primary Listing Details
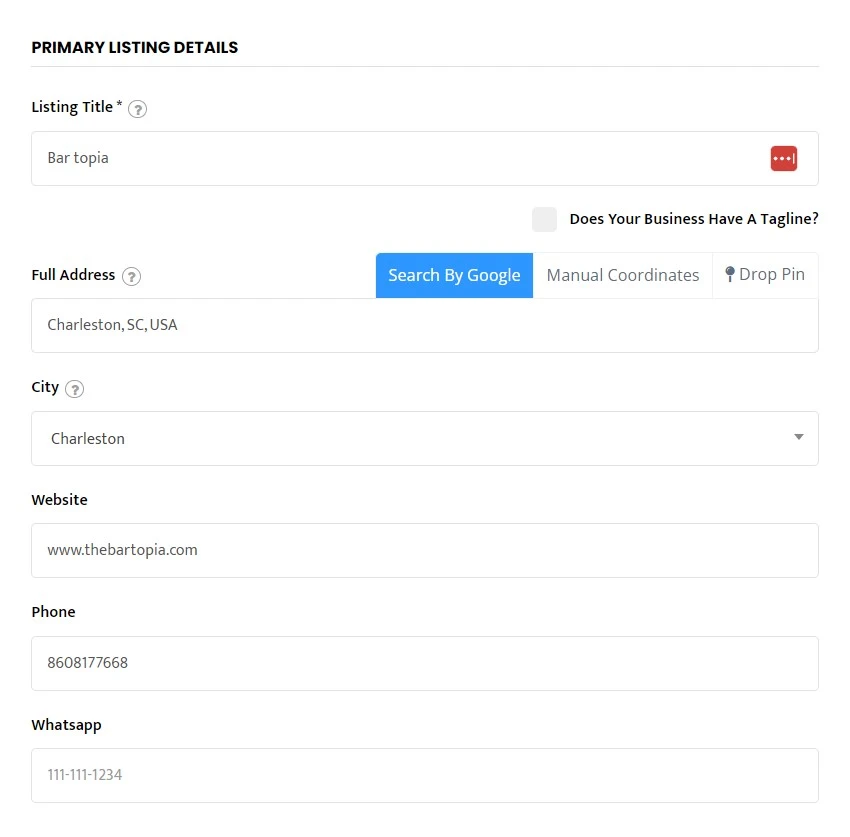
Listing Title
This one’s pretty self explanatory, it’s the name of your establishment. If you have multiple locations in the same state or county, you might consider adding a location detail to the title to distinguish it and avoid confusion. It’s up to you!
Tagline
You have the option to add your business tagline or slogan by checking the box under the Listing Title field.
Full Address
We recommend using the “Search By Google” method (highlighted in blue and selected by Default). It will be easier and quicker for you, and it optimizes for our map feature better than Manual Coordinates.
City
City is technically separate from the address of your business. It’s a label so that users can search by geographical area. Most likely it will be the same as the Town/City in your address, but it can also be the county in some cases. Simply choose the most accurate option available.
Website
Also self-explanatory, this should be the link to your business’s home webpage. If you have multiple locations, we recommend using the link to this listing’s webpage specifically.
Phone
This should be the landline number for your establishment.
This is optional.
Category & Services
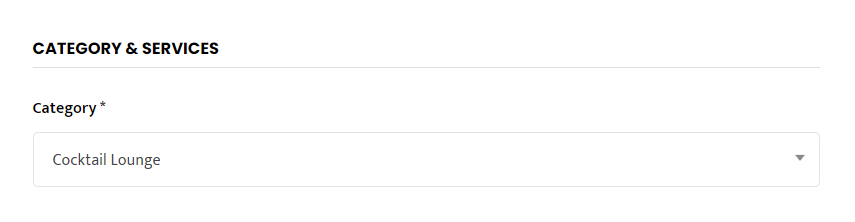
In this section, select the category that best describes your establishment. Most establishments are more than one, such as both a bar and restaurant or a bar and cocktail lounge, so we encourage selecting multiple.
Price Details
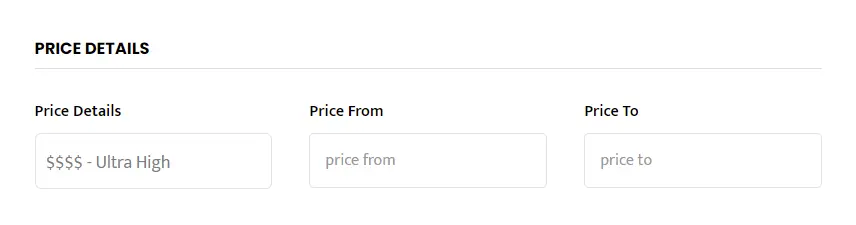
The Price Level is an additional part of your branding on Bartopia, and is another way users can filter and search for places. We refrained from making a framework for classifying the price level of each business on Bartopia so that you, the managers/owners, could choose yourselves. You also have the option to list the price range of your menu so that customers have a better idea of what they can expect to spend.
Pro Tip: If you’re finding your deals are attracting ‘cheaper’ clientele than you want, you can try raising your price level to discourage those taking advantage of your generous offers.
Business Hours
Your Hours of Operation will be straight forward. Some establishments close in-between lunch and dinner, so we give you the option to add a second time slot by checking the box in the bottom right. Once you have chosen the hours for a selected day, press the blue + button to save that day.
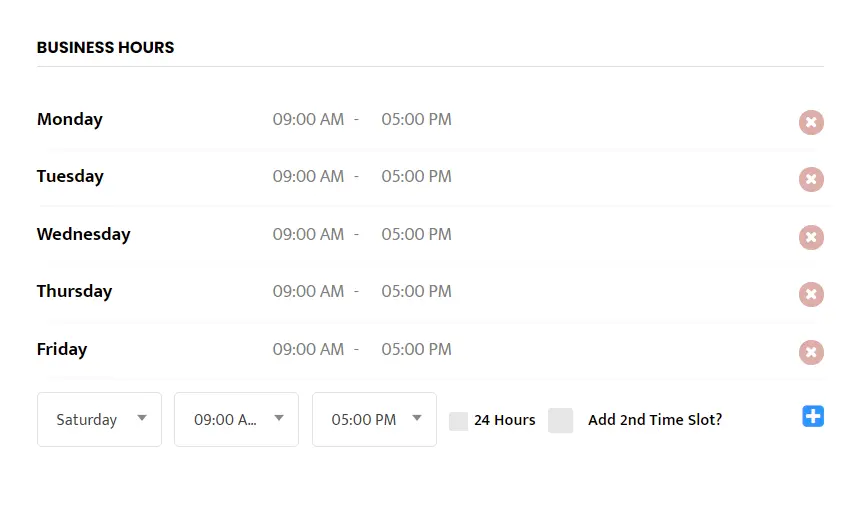
If you close at or after midnight some days and it won’t let you complete your hours, please reach out to us and we will edit it for you. We’re working on fixing this but in the meantime we can only change it from the back-end.
Social Media
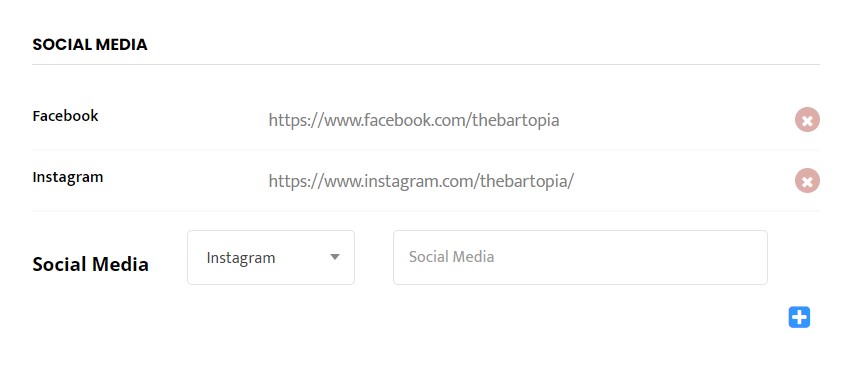
This area is for you to provide links for each of your social media accounts. Your social media accounts you provide will be displayed as an icon for each platform. It’s important you provide a link to the webpage of each account and not your username so that users can click on them directly.
Select a platform using the drop-down list, paste in the URL of your page on said platform, then press the blue “+” button.
Frequently Asked Questions
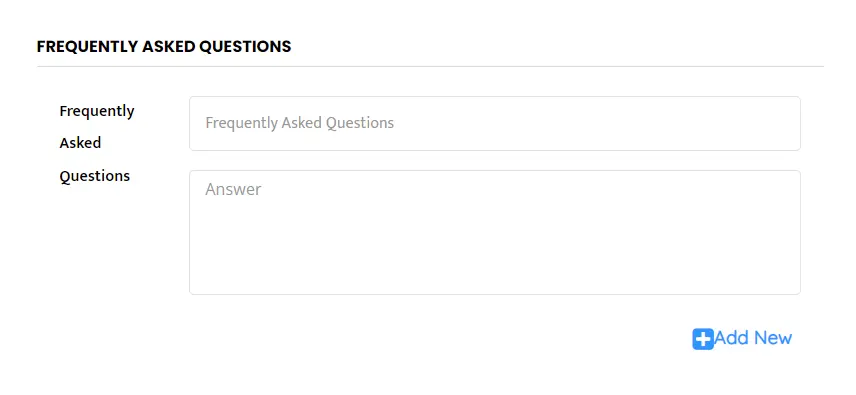
FAQs that you upload will be displayed as a list of the questions with drop-down menus to expand and show the answer. You’ll need to fill out each question individually as a 2-part question and answer, then press “+ Add New”
We’re working on a way to expedite this process, but in the meantime it’s optional and users can always find an FAQ page directly on your website.
Deals & Tags
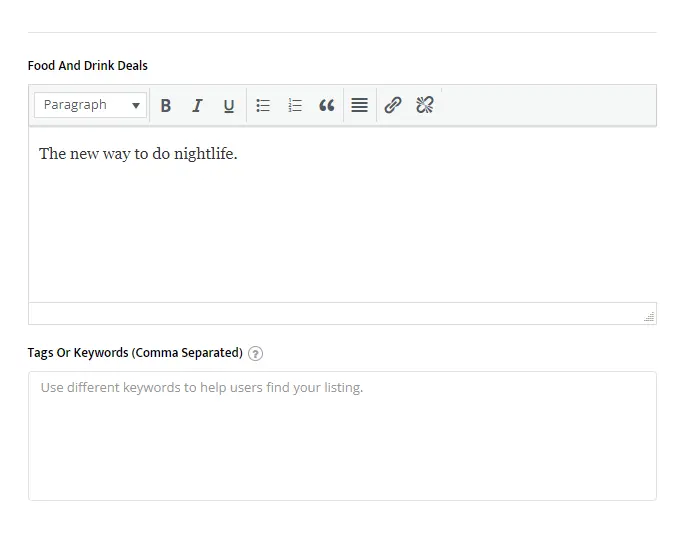
Food and Drink Deals
This section is dedicated entirely to your deals and specials. It’s built just like any text-editor like Word or Google Docs. You can use different sizing like Header 1, 2, 3 etc. bold, underline and bullet points. It’s completely up to you, but we recommend using H6 for all text, and making headers like “Happy Hour” or “Taco Tuesday” bold. This will look great both on the page and the display in search results.
You may need to make all text bold before changing it to different text types like H6, then un-bold it after for it to take effect.
Tags or Keywords
A big part of how users can search and discover places is through filters. Your “Classification” such as Pub, Cocktail Lounge, Brewery, etc. is a base method for users to search by. Tags and Keywords are additional filters people can use to specify what they are looking for. For example, if someone is walking around town with their dog, and decides to stop somewhere for a beer, they can filter their Bartopia search to only show establishments that are Dog Friendly, or have Outdoor Seating.
Remember to separate each tag/keyword with a comma and capitalize the first letter of each word.
Using as many keywords as possible (while maintaining accuracy) is one of the biggest things you can do to optimize your page’s discoverability and viewership.
Here is a list of some popular Keywords:
- Outdoor seating
- Dog Friendly
- Draft Beer
- Craft Beer
- Handcrafted Cocktails
- Dive Bar
- Sports Bar
- Comfort Food
- Burgers
- [A country, for example English Pub]
- Rooftop
- Margaritas
- Brunch
- Oyster Bar
- Wine Tastings
- BBQ
- Sushi
Be creative with it!
Additional Details
Description
This area is for you to describe your establishment for someone who has never been before. Your images will showcase your aesthetic, this description is where you can paint more of the picture and showcase your brand. Do you pride yourself on being a dive bar? Are you an upscale cocktail bar? Maybe your main crowd is sports fans? Or is your comfort food what keeps people coming back? Use your description however you see fit, or leave it blank, totally up to you.
Note that there is a separate area to add your business tagline right below your Listing Title, so try to use the Description for other purposes.
Dashboard
Let’s return to this original image where we first went into the Edit button [2]. Once you’re sure all the information for your business and deals is correct, you can manage your page by clicking on your username in the top right corner [3].
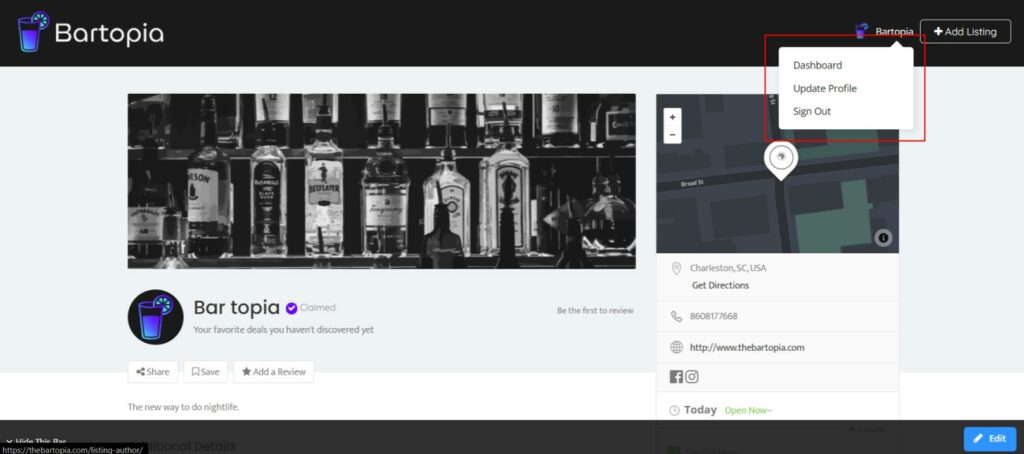
This top banner is accessible on all screens and if you hover your cursor over your username, you’ll see a drop down menu where you can click “Dashboard” (above). You can also just click on your username.
That takes us to the following screen:
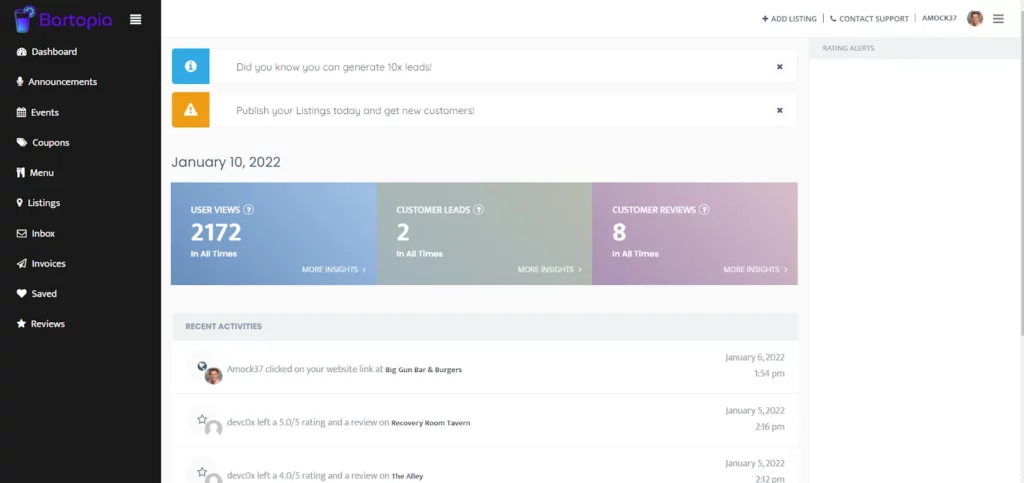
This is your dashboard where you can view and manage all of your pages’ interactions with your customers. There’s a lot to unpack here but don’t be overwhelmed, it’s very easy to use and we’ll walk you through each part.
Let’s start with this first screen we’re taken to.
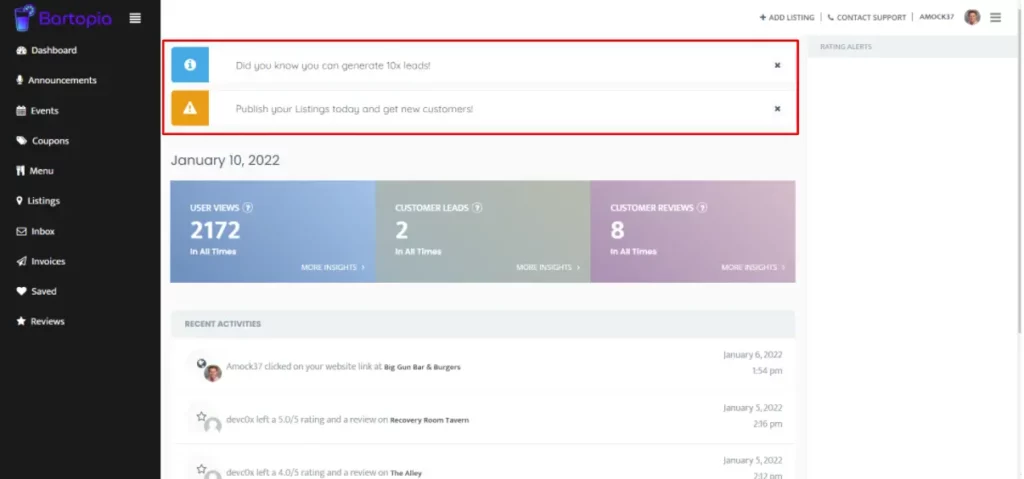
We can start by closing out these default pop-ups to clear things up.
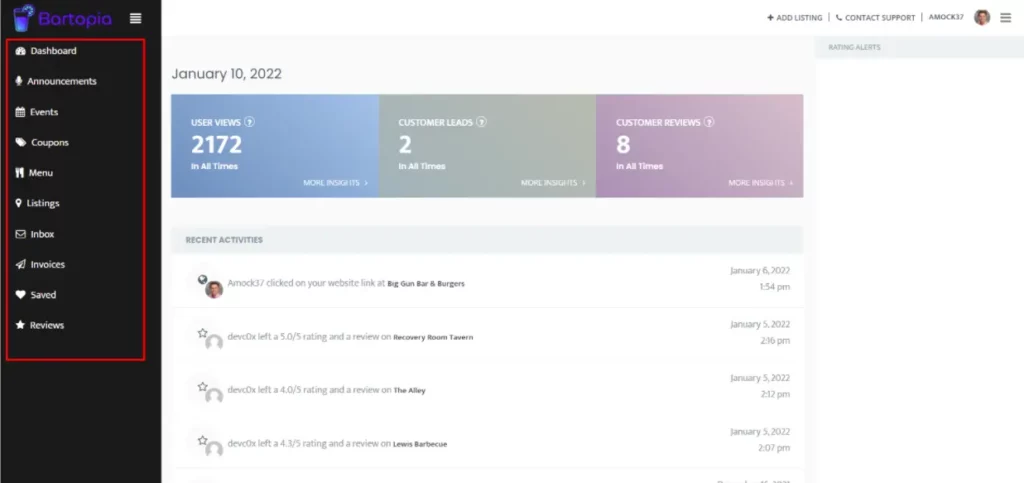
Things already look more manageable! Let’s start from left to right. On the left side highlighted in red above, is your navigation panel. We’ll go through each of these sections and what they do in a moment, but this is how you can toggle from section to section of your page’s management. We are currently in the top section called “Dashboard”.
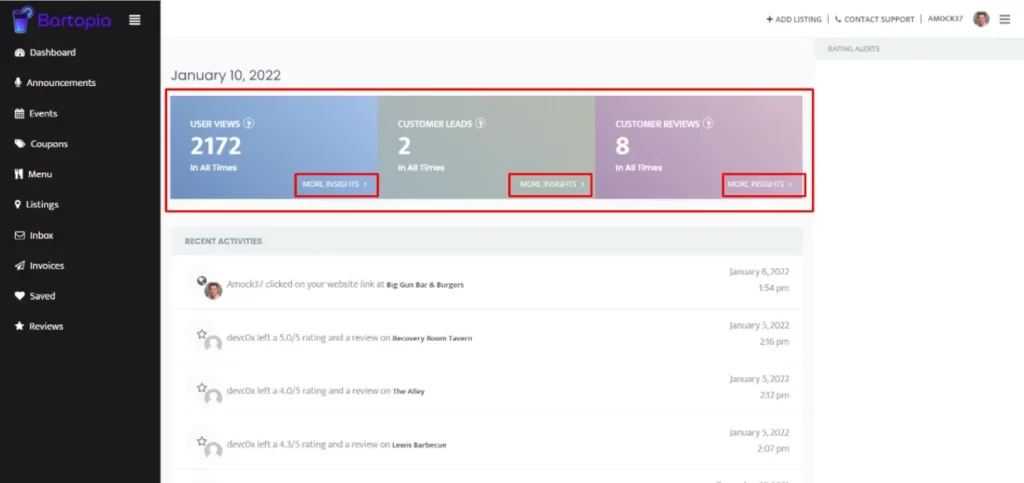
Moving to the middle, the upper colorful section is your Analytics section. This is where you can view a breakdown of views to your page, customer leads and reviews. Customer leads are when a user clicks on something to go directly to your business such as your website, reservation platform or food delivery services.This can be expanded by clicking “More Insights” under each category.
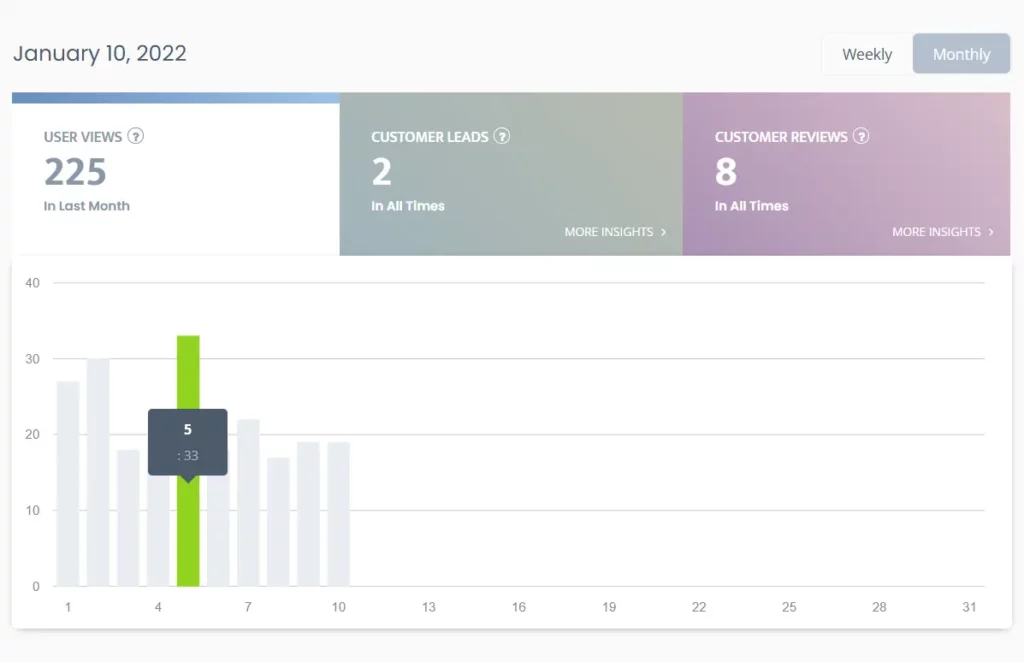
Once you expand this dashboard you can see a breakdown of each category by the day. You can also toggle between weekly and monthly views in the top right corner.
The goal of this is the ability to analyze the impact of specific deals on traffic to your page. For example you may notice that on Wednesdays when you offer half off all wine bottles, your page views skyrocket. This can help you better manage and optimize your page, as well as provide insights to your business strategy.
Our goal is for Bartopia to be a tool to increase your traffic and publicity and we try to provide as much transparency as possible.
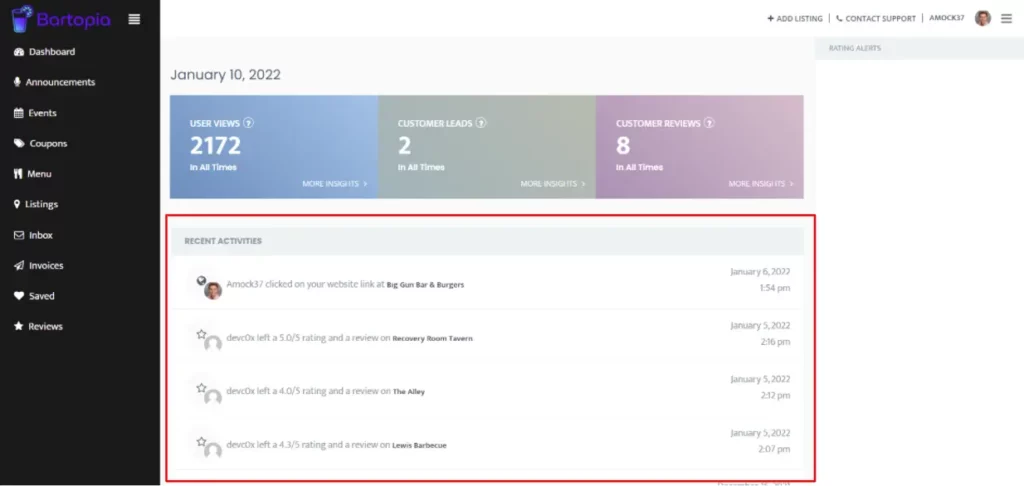
Right below the Analytics section in the center we have recent activities on your page. This is somewhat of a live feed of what users are doing on your page. It simply gives you more insight into the activity summarized above in the Analytics section. It allows you to potentially reach out to a user who left a bad review, identify potential issues and see what your users are talking about.
Announcements
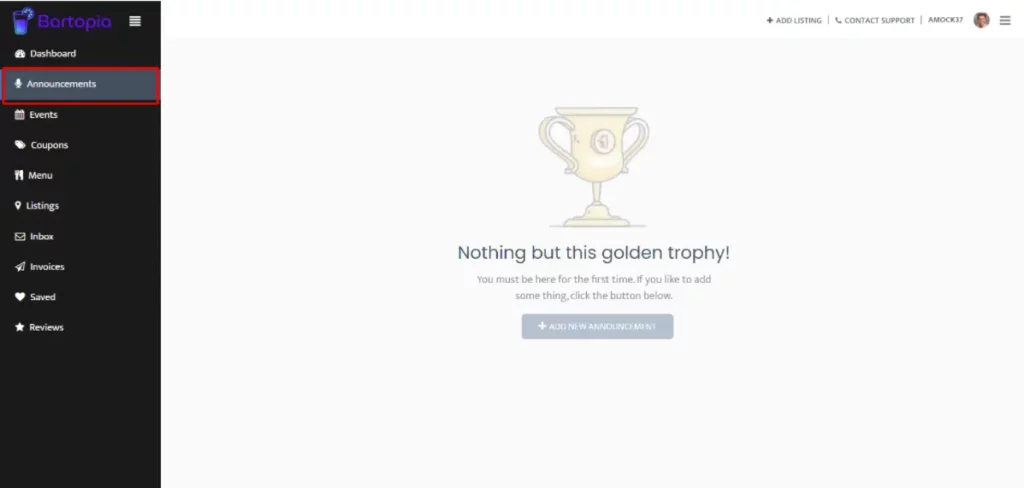
The next section under Dashboard is Announcements. This is where you can make announcements that will go directly to your customers. Bartopia users that Save or Favorite your listing will get an alert directly whenever you add a new announcement. This can be a useful tool for last minute announcements such as holiday hours changing, menu changes, or other communications that you’d normally post on to your social media channels.
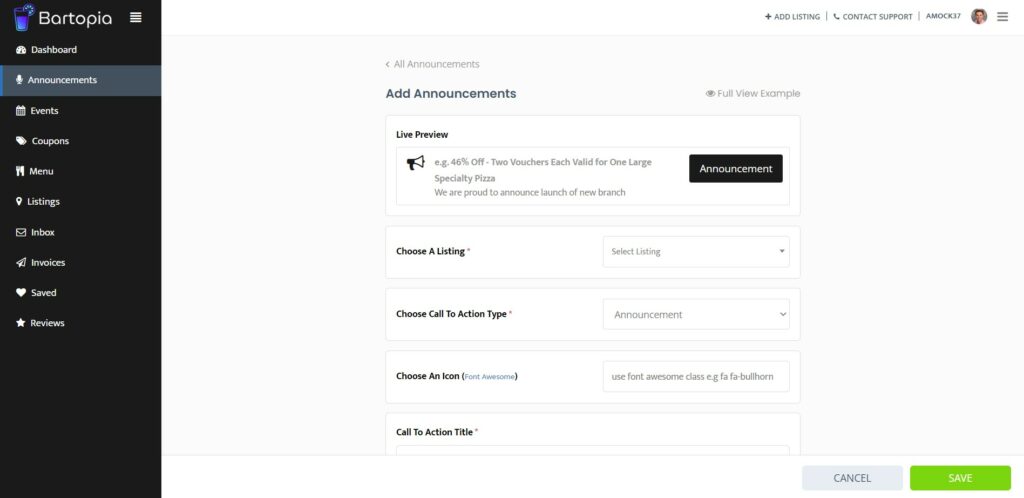
Live Preview
This will change as you fill out this page so you can see what your followers will see.
Choose a Listing
This only applies to admins who manage more than one listing, in which case you can specify which the announcement applies to.
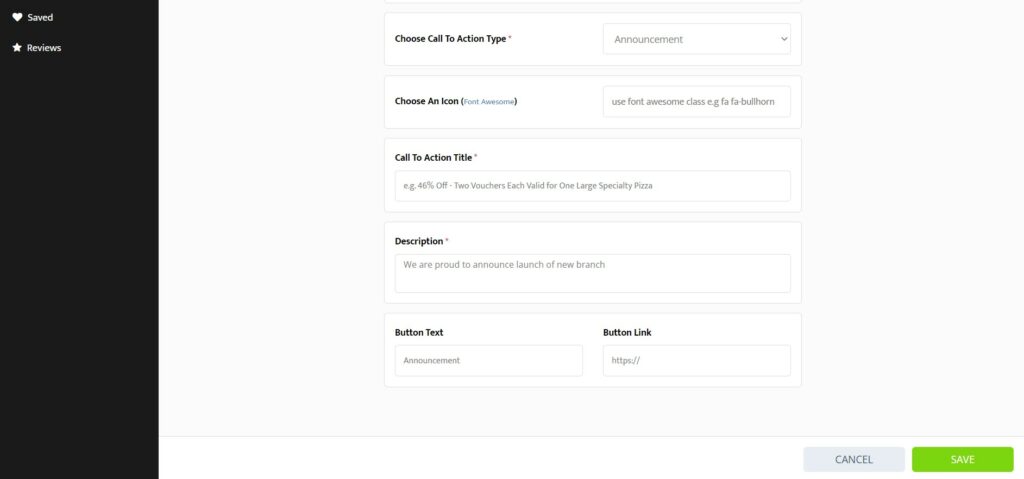
Choose Call To Action Type
This just narrows down what type of button users will click on. The options are:
Announcement
Book Now
Buy Tickets
Contact Us
Get Offer
Get Quote
Join Now
Learn More
Print Now
Reserve Now
Schedule Appointment
Choose an Icon
Here you can use custom icons do display on the left side of the announcement banner. This could be something like a pizza icon for pizza coupons, or a cocktail icon for a happy hour.
Call To Action Title
This will be the title of the announcement, displayed at the top of the preview at the top.
Description
This will display just under the title where you can provide more details about the announcement.
Button Text | Button Link
Here you can choose what the button you’d like users to click on says. It’s displayed on the right side of the preview at the top. If you’d like the button to take users to your website or Facebook for example, you can link the button to that page and clicking it will take them there directly.
Display
Once you’re finished and press “Save”, the announcement will display at the top of your listing page for all visitors to see!
Events
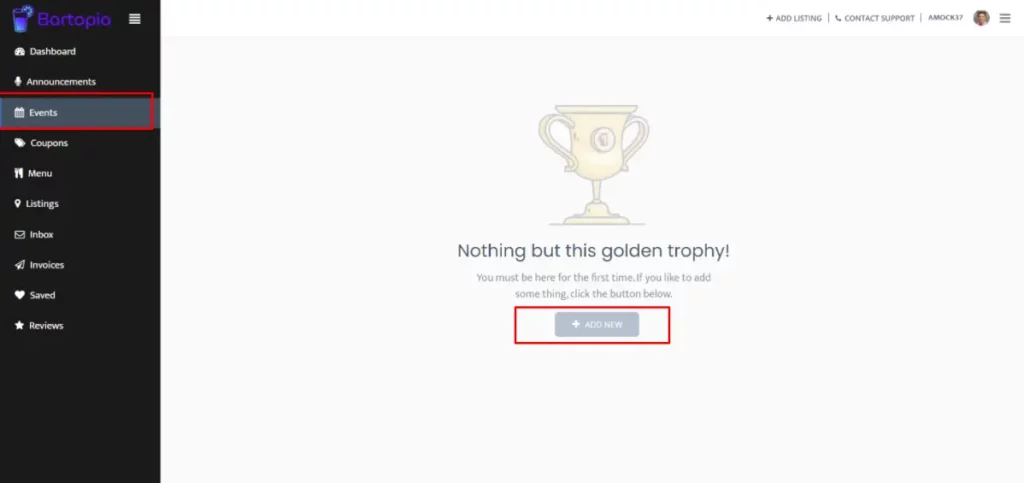
Events are the flip side of announcements, however with events users can interact with them. Similar to events on Facebook, users can say they are coming or thinking about coming as well as share the event with friends and buy tickets if necessary.
Let’s go through adding an event by clicking “+ Add New”
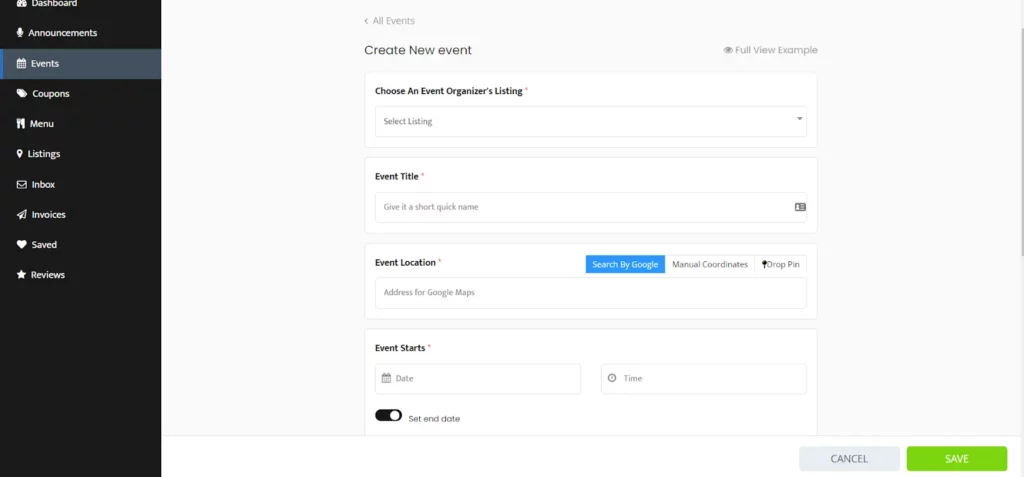
Choose An Event Organizer’s Listing
This will mostly apply to admins that manage multiple listings, for most you will just select your listing title.
Event Title
This is what users will see as the name of the event. You have room later for a detailed description so try to keep it concise.
Event Location
We gave admins this option in case you’re hosting an event somewhere other than the location of your listing. It also serves as navigation directly from the event announcement. If the event is at your listing location please just re-enter the address.
Event Starts
This is when your event starts. The site is going to require you to set an end date, if you’re confused just toggle the “Set end date” switch and enter a finish time.
Event Description
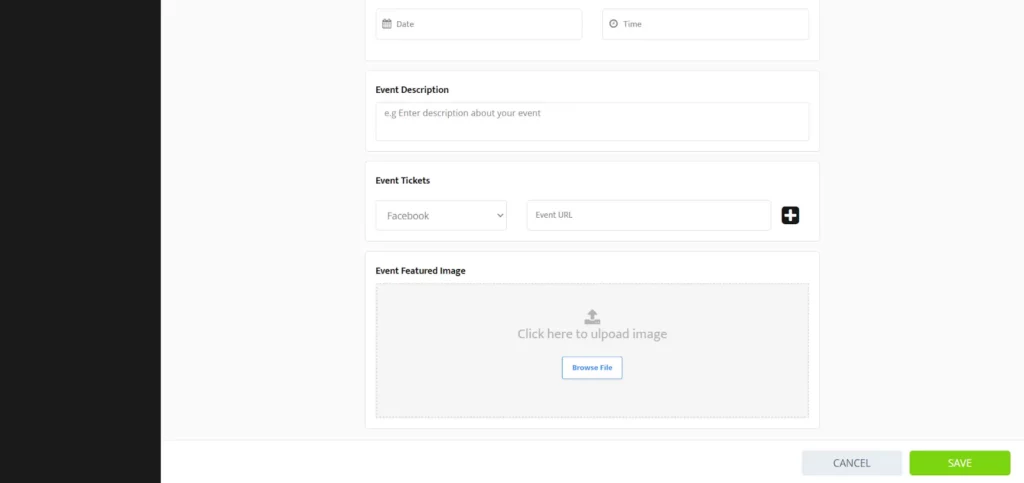
This is where you can provide as detailed of a description as you’d like. You can provide info such as the theme, dress code, what will be served, specials, promotions or what type of music will be played.
Event Tickets
Some events will require ticket entry and many businesses like to sell and promote these through Facebook. If this applies to your event you can provide the link to purchase them.
Event Featured Image
Lots of times you’ll have flyers or graphics already made to promote the details of your event, you can add this as a PNG, JPG or JPEG. We recommend also filling out our fields to help optimize the discoverability of your event.
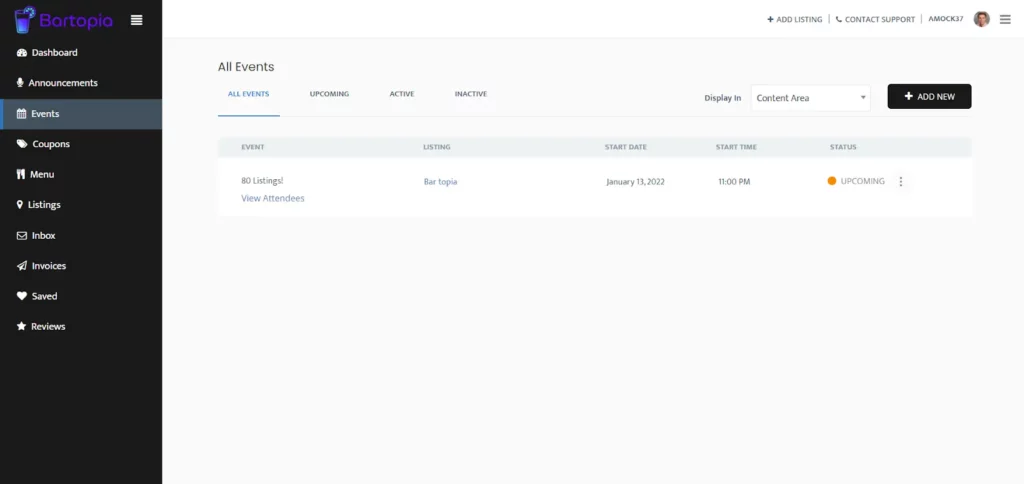
Congrats! You’ve successfully created an event. You can now view your events dashboard where you can filter events by All, Upcoming, Active and Inactive. Under each event you can also view attendees who have responded saying they will be coming.
In the top right corner you can choose for the event to display in the Content Area or Sidebar Area of your listing. This is a matter of preference in the aesthetic of your page and how much content you have displayed in each area already. We will soon have recommendations on what combination is most successful but play around with both and see what you like.
Coupons
Coupons will probably rarely be used but may be useful to some businesses. Once we click the Coupons tab and press the “+ Add New” button we are given the above menu, very similar to Events.
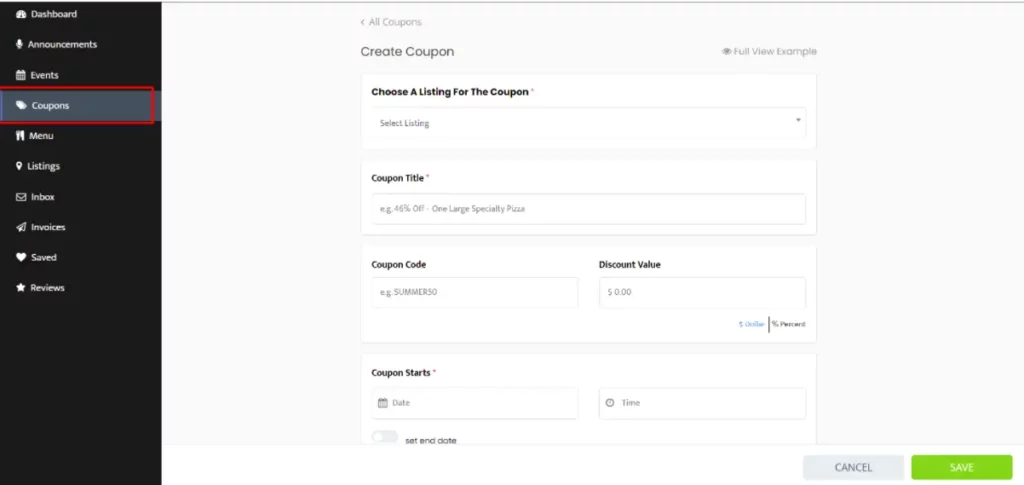
Choose A Listing For The Coupon
Same as in the Events tab, here you’ll choose which listing the coupon is for. Unless you have multiple listings this will just be your establishments’ listing.
Coupon Title
You’ll put the amount in the next field so this should be some other title relating to the day or event, Wine Wednesday for example.
Coupon Code
This code is what users can show as a digital coupon to get their discount. We’re working on a way to incorporate this into your business more easily.
Discount Value
Here you can offer a specific dollar amount off or a percentage discount off the total.
Coupon Starts
This is for coupons that are only active for a select duration. If the coupon is active indefinitely you don’t need to choose an end date, unlike Events.
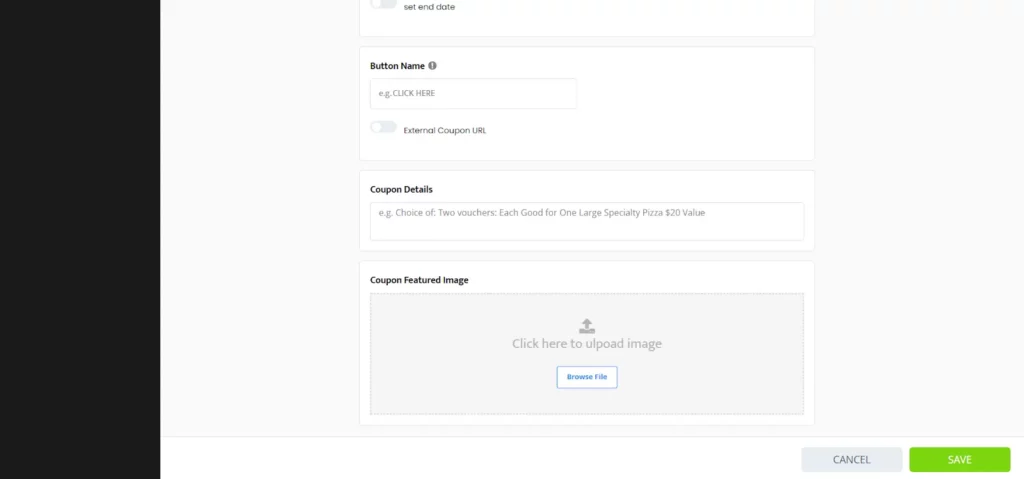
Button Name
This is what will display on your listings’ page and where you can provide a link to a coupon that is on your site or social media. Users will click on this button to view the coupon itself. You can name it the same as your Coupon Name, an abbreviated version, or whatever you’d like. It is optional.
Coupon Details
Here you can provide more details about usage of the coupon or the motivation behind it.
Coupon Featured Image
Similar to in Events, if you have a graphic or poster already made you can upload it here.
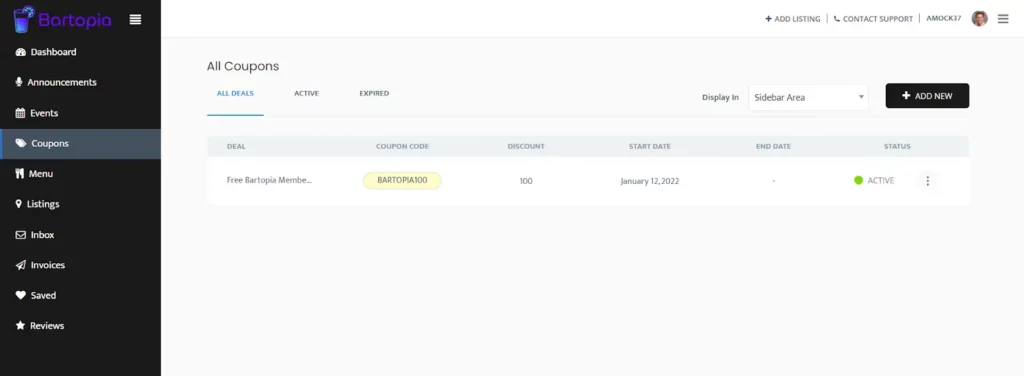
Congrats! You’ve successfully created a coupon. Here you can manage all your coupons and filter by All, Active and Inactive. The same format as events, you can choose whether these display in the Content Area or Sidebar area of your page. You’ll want to play around with what’s displayed in each of these sections but we recommend trying to maintain general themes for each area. For example having all Deals and Coupons in the center Content Area, and Events in the Sidebar area. Please reach out to us, we’re happy to help!
Menu
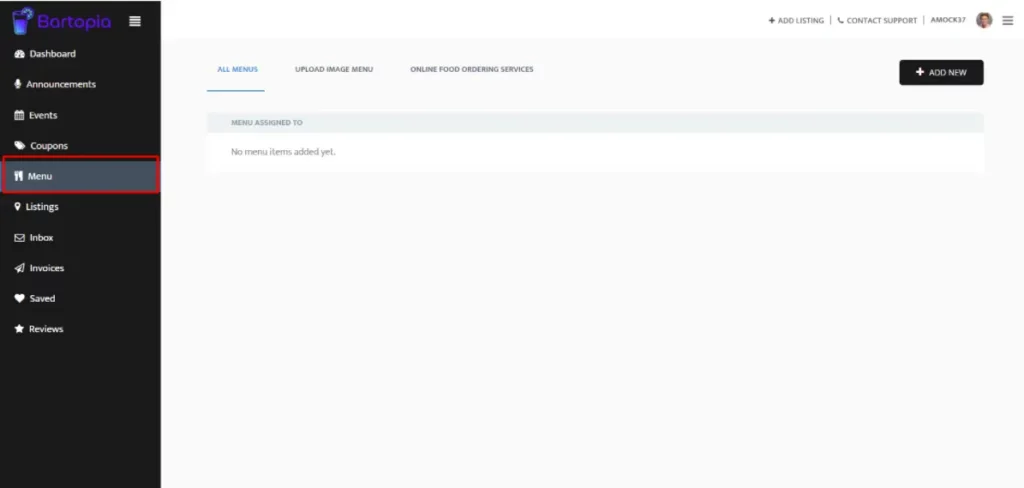
The Menu tab is where you can manage uploading menus and connecting users to ordering services. The above image is the first tab “All Menus”. This is where you can upload individual menu items to essentially re-create your menu on Bartopia. This is very time intensive and we do not recommend it.
Instead you can upload an image or PDF of your menu in the next tab called “Upload Image Menu”

To upload an image menu, after selecting the listing it’s for, click “Browse File”
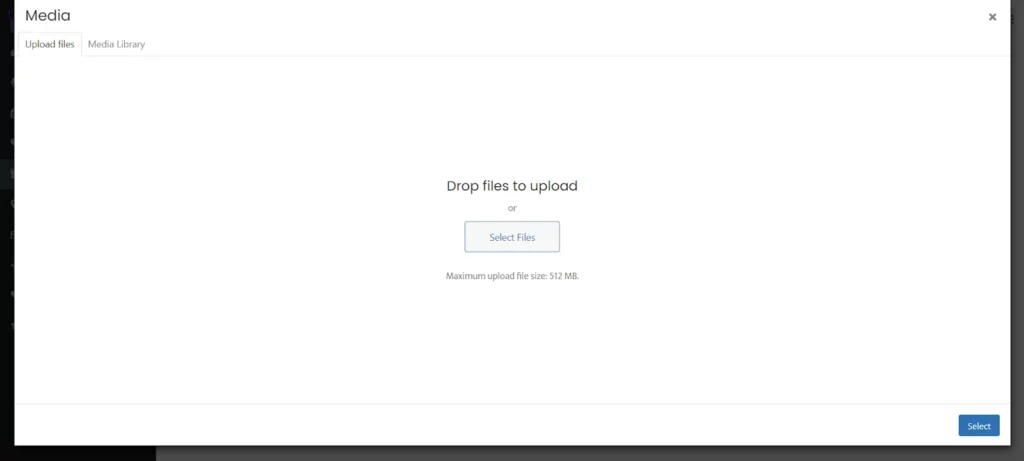
That will pull up this menu, where you can choose a file from your computer or drag and drop from another application. Once you’ve chosen your file, you will be taken to the screen below:
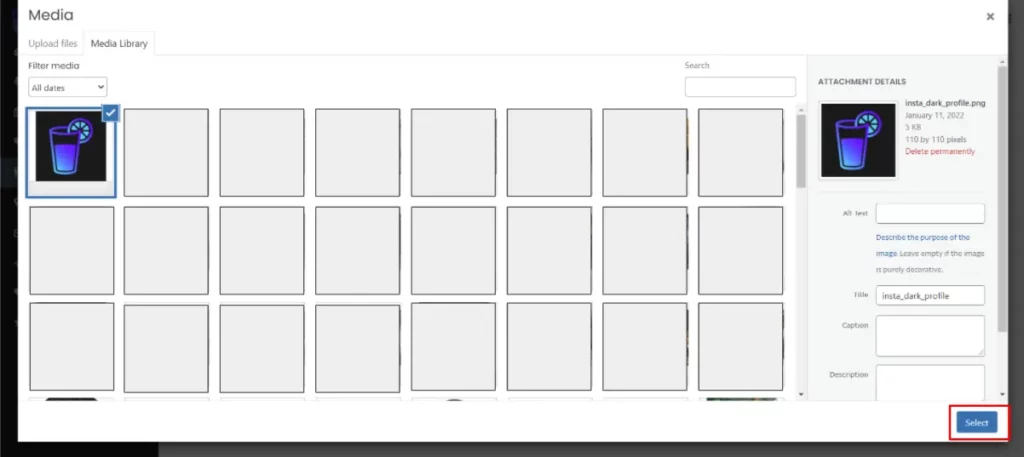
This is your Media Library, note that it’s just a tab over from where you uploaded your menu (top left corner). If you need to add more just go back to Upload Files.
If you’re all set with your image file, press the blue Select button in the bottom right corner.

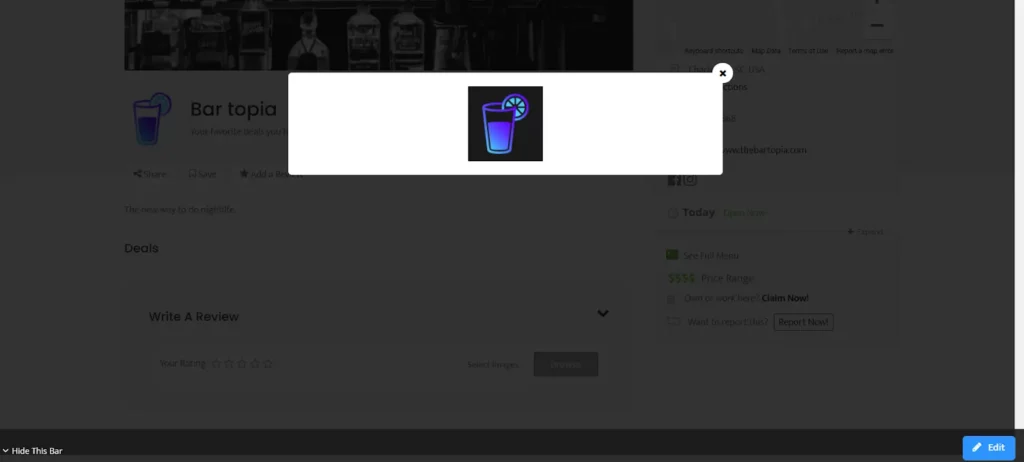
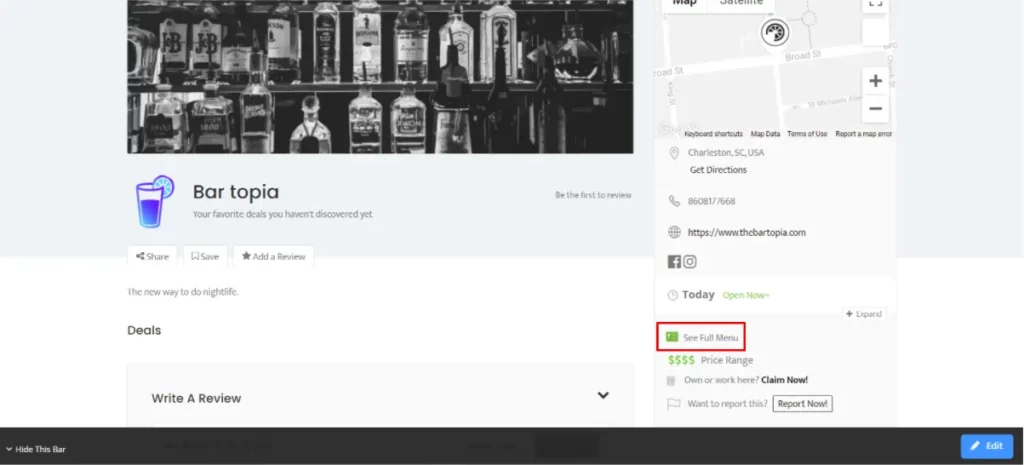
Once you have your image selected and have chosen the correct listing, you can press the blue + to upload it to your page. Here is where users can access it:
Listings
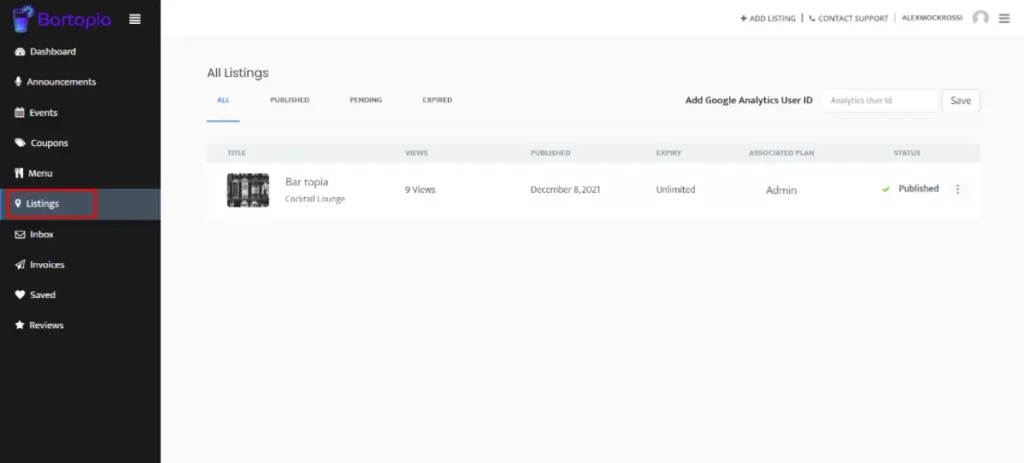
The next tab is Listings, this will only really be useful as an overview for admins who manage multiple listings. We are working on rolling out more features for managing and tracking the performance of multiple listings on one account, as well as having multiple accounts able to access a given listing.
Inbox
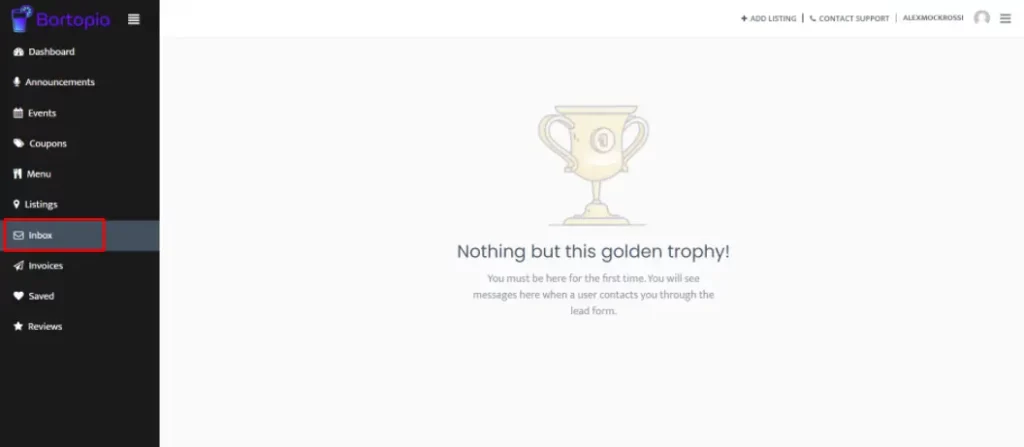
One of the cool features of Bartopia is that users can reach out to you directly from your page. These communications will show up here in your Inbox tab. You can treat it like a messaging or email section, and can respond directly through Bartopia. You will also get an email notification when someone reaches out to you.
Invoices
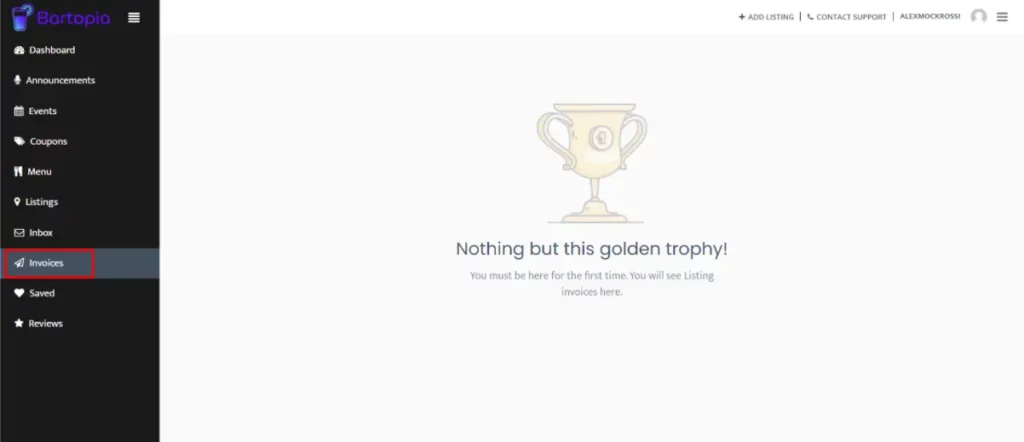
Right now there’s nothing on Bartopia that isn’t free. But soon we plan to offer ad campaigns to boost the discoverability and ranking in search results for your listing(s). Similar to OpenTable, you’ll be able to pay for your listing to come up first when users search in a geographical area that contains your establishment. We’ll be able to give you tangible ROI stats such as increase in views and leads to your website, reservation sites like OpenTable and Resi, and to food ordering services like DoorDash and UberEats.
Once these campaigns roll out, you can view and manage all of your invoices in this tab.
Saved
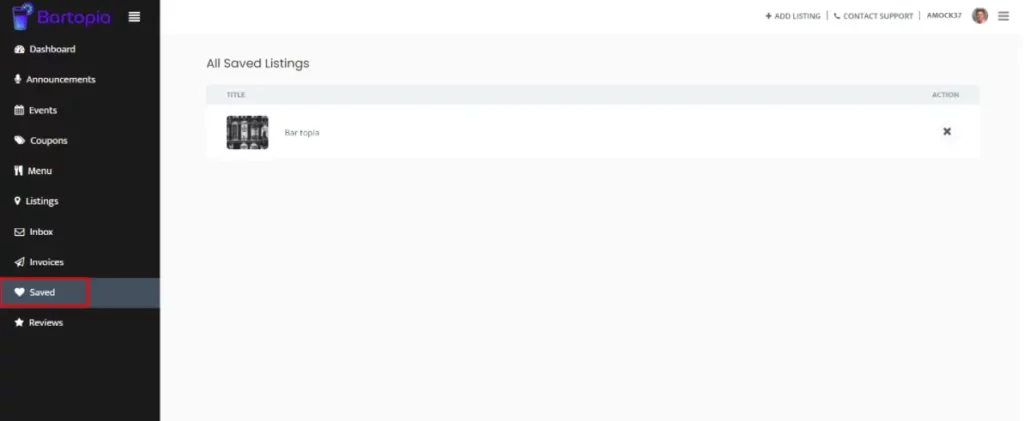
The Saved tab is mostly for users and not admins, but this is where you can view all the listings that you have favorited or saved by pressing the little bookmark icon. We imagine as admins you won’t need this, but we’d be thrilled if you also used Bartopia as a user to find new bars and deals yourself!
Reviews
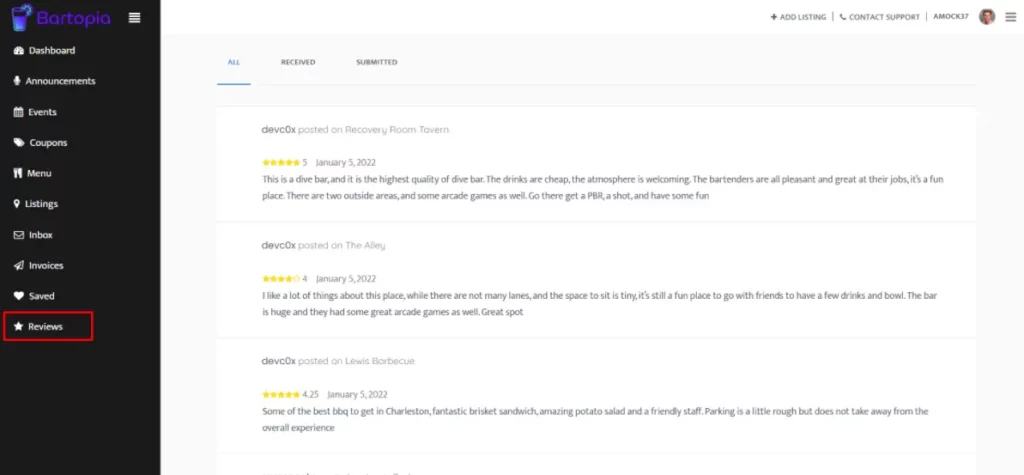
The very first tab we looked at Dashboard had a snapshot of recent reviews, the reviews tab is an expanded version where you can look at what users are saying more in depth.
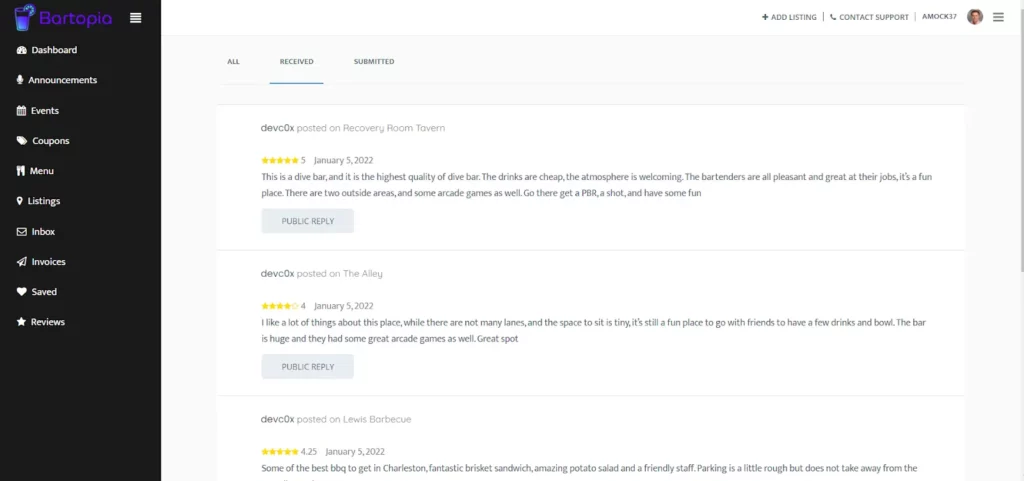
If you click on the Received tab, you have the ability to reply publicly to different reviews, the same way you could on Yelp or Google. Keep in mind these are public replies and everyone on Bartopia can see them.
Conclusion
That wraps up our comprehensive administrators guide to using Bartopia. We hope this was helpful and can answer any potential questions that you may encounter. As always please reach out to us through the Contact Us page with literally anything we are more than happy to help.
We’ll keep you updated as we bring out more features to improve as a marketing tool for bars and restaurants.
Thank you so much for using Bartopia.